At
Shelving Megastore we pride ourselves on helpful and knowledgeable advice. When dealing with shelving components on a daily basis it easy to assume that everyone knows the name and function of each part, many do, but many people don't, so if you are new to the world of shop shelving this guide is for you. At the end of the series you should be an expert, by the end of this part 1 you should know your base feet from your uprights or your back panels from your plinths!
Lets start with a diagram of a standard Gondola shelving bay.
 |
| Shop Shelving Components Diagram |
The components used to make a single sided wall shelving unit and a double sided gondola shelving unit are same.
Starting at the bottom we have the base legs, these are sometimes also called base feet and the terms mean the same thing. The base legs slot into the upright, they have adjustable feet on the bottom for levelling the shelving unit and they also function as the brackets for the bottom shelf. A gondola shelving unit has 2 base legs on each upright and a wall shelving unit has one base leg per upright.
 |
| Shelving Base Leg |
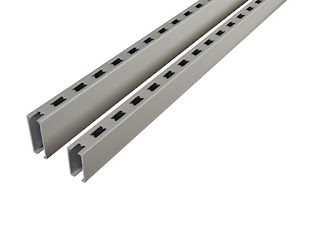
We just mentioned the shelving uprights, so we will move onto these as the base legs join onto the Uprights, sometimes called posts. The uprights are simply a rectangular steel tube, with slots in the short edge on both sides. The slots vary in shape and spacing depending on the make, and the spacing between the top of one slot and the top of the next is the shelving pitch, this is the distance that the height of shelves can be varied, so as Shelving Megastore's shop shelving is a 50 pitch system this spacing is 50mm, which means in effect that the shelves can each be moved up or down in increments of 50mm. 50mm pitch shelving systems are very common and most are compatible with each other. The picture below shows shelving uprights, you might notice they are different sizes, the top one is simply a thicker and heavier duty version of the bottom one (more on that later).
 |
| Shop Shelving Uprights |
So now we know the components that make the whole shelving bay stand up, the base legs and the uprights, when they are joined together the complete item is often called an
end of run leg which was covered in an earlier post.
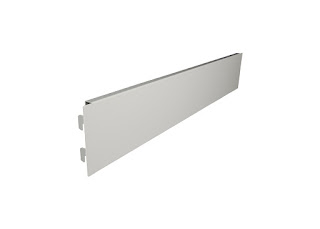
Now to make a shelving unit we need to join the uprights together to make a frame, to do this we use back panels. The back panels are not indicated on the diagram, but they are the panels behind the shelves joining the 2 uprights together. Back panels have what can best described as "lugs" on each end that locate into the upright's slots and are then pushed downwards to secure them into the upright slots. The back panels come in different lengths and heights, the lengths correspond to the shelving bay length (the distance between the uprights) and the height is in sizes from 100mm, 300mm and 400mm. The number and size of back panels used depends on the height of the shelving unit, with our SWSF shop shelving system the total height of back panels is 110mm less than the upright height. Therefore for a 2110mm long upright, 2000mm of back panels is required which is simply 5 of the 400mm high panels. Always choose as many 400mm and 300mm height back panels to get the most cost effective solution. For an 1810mm high upright, 1700mm must be covered which is best achieved with 4 x 400mm and 1 x 100mm back panels.
On gondola shelving there are back panels on both sides of the shelving bay, this is also the case with end bays (more on end bays in a later post). To further complicate matters there are different types of back panels, plain panels are the lowest cost and most commonly used, perforated backpanels have holes in them for pegboard hooks and are around twice the thickness of steel, finally there are slatted back panels for slatwall fittings, these are 100mm high panels and look like slatwall when the shelving unit is assembled.
 |
| Shelving Plain Back Panel |
 |
| Perforated Back Panel |
 |
| Slatted Back Panel |
Finally for this part we have plinths, sometimes called kickers or kick plates. The plinth is a component that is used mainly for cosmetic reasons, it slots into the base feet and runs under the base shelf to give a neat finish and prevent dirt or more likely anything that is dropped on the floor from rolling under the shelving. There are 2 types of plinth, the standard plinths just hooks in to the base legs in a similar way to the back panels, these have the advantage that they can be removed without having to move the base shelf or it's contents. The other type of plinth slides into the base leg from above and has a rubber strip on the bottom that helps prevent dirt getting under the shelving unit. These type of plinths need the base shelf to be removed before they can be removed for cleaning behind. At Shelving Megastore we stock both types of plinth but recommend the easy to remove type, which is our standard shelving plinth.
 |
| Standard Plinth - Easy to remove |
In the next post we will go through more shelving components, I hope this has been a helpful post. If you want to view our great
range of quality shop shelving please visit the Shelving Megastore or call us on 01752 829467.
Shop Shelving Guide - Shelving Components Part 2


No comments:
Post a Comment